
Table Of Contents
How Many Lumens Should a Bike Light Have? A Scenario-Based Guide
How many lumens should a bike light have? For a front light, a practical starting point is about 200–400 lumens on continuously lit city streets, 500–800 lumens on mixed routes with dark sections, 800–1,200 lumens on unlit roads, and roughly 1,200 lumens or more for faster or technical trail riding. These are shopping ranges, not universal safety thresholds. The beam pattern, mounting angle, sustained output, speed, surface and runtime can make two lights with the same lumen rating perform very differently.
Start with the darkest part of the route and the speed at which you will ride it. Then ask whether the beam puts useful light on the road for long enough. A headline lumen number is valuable, but it is only the first filter.
How Many Lumens Should a Bike Light Have? The Short Answer
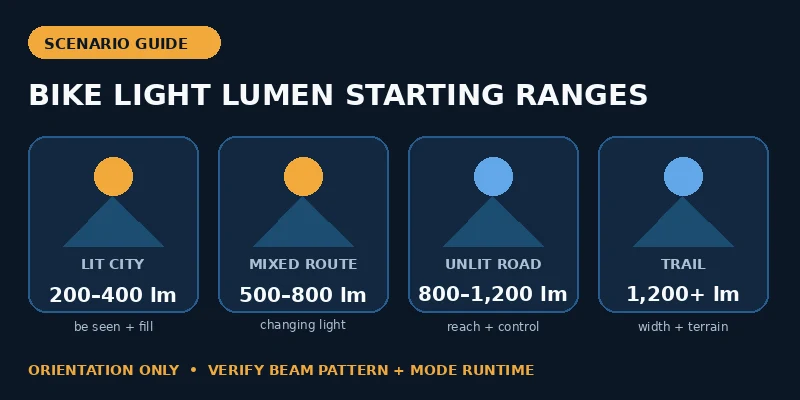
A bike light should have enough usable output to reveal hazards within the distance you need to see, without sending unnecessary glare into other people’s eyes. A rider on a well-lit commute may mainly need to be noticed and to fill occasional shadows. A rider on an unlit lane needs a steady beam that shows the surface and bends ahead. A trail rider needs both forward reach and peripheral light for roots, rocks and turns.
For most buyers, the following ranges are a defensible place to begin:
| Riding condition | Front-light starting range | What matters after lumens |
|---|---|---|
| Continuously lit streets | 200–400 lm | Controlled aim, conspicuity, side visibility and adequate runtime |
| City route with short dark sections | 300–600 lm | A useful medium mode and enough reach for the darkest segment |
| Mixed urban and unlit roads | 500–800 lm | Smooth beam distribution, stable mount and high-mode runtime |
| Fully unlit roads | 800–1,200 lm | Forward reach, glare control and sustained output |
| Fast gravel or technical trails | 1,200 lm and above | Peripheral coverage, terrain detail, secure mounting and reserve power |
Current buying guides do not agree on one exact number because no one number can describe the full lighting task. Treat the ranges as an orientation tool. A well-controlled 600-lumen beam can be more useful on a road than a scattered 1,000-lumen beam, while a fast trail rider may need substantially more output and a different optical pattern.
What Do Bike Light Lumens Measure—and What Do They Miss?
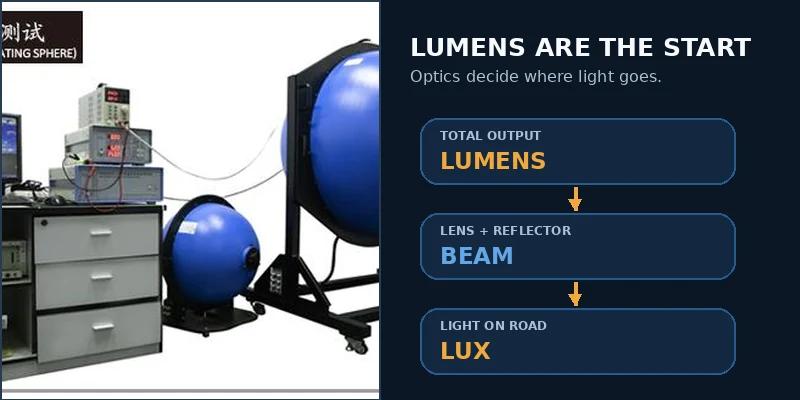
Bike light lumens measure luminous flux: the total visible light emitted by a source. The U.S. National Institute of Standards and Technology realizes the lumen as the unit of total luminous flux. That definition is important because it explains both the value and the limit of a lumen specification. It tells you how much visible light leaves the source, not where that light lands.
Lux describes illuminance on a surface. One lux equals one lumen per square metre, but a lux value is only meaningful when the measurement distance, position and test conditions are stated. Candela describes intensity in a particular direction. In practical terms, lumens help compare total output, while beam photographs, lux measurements at a stated distance and candela data can reveal how the optic distributes it.
Imagine two 600-lumen lights. One concentrates most output into a small hotspot. It may appear bright at the centre but leave the road edges dark. The other spreads light across a broad area. It may improve peripheral awareness but reach less far. A shaped road beam may direct more of the same total output below the horizon, where it helps the rider without wasting as much light upward.
The maximum lumen figure may also describe a short peak rather than the level maintained through a ride. If sustained-output data or a runtime curve is available, use it. If it is not, compare the declared steady modes and ask the supplier how runtime was measured.
Bike Light Lumens by Riding Scenario: City, Unlit Road and Trail
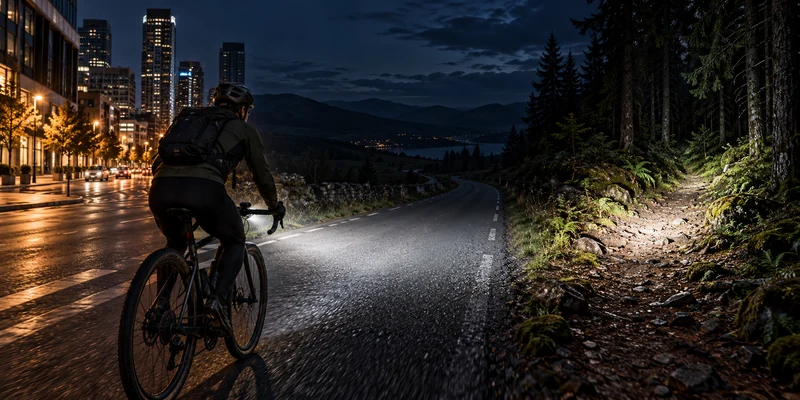
Bike light lumens should follow the lighting job. On continuously lit streets, the rider can already see much of the road under street lamps, so the front light often works primarily as a visibility signal and as fill for gaps. Around 200–400 lumens can be a reasonable starting range when the beam is controlled and the route truly remains lit. More output can provide reserve for a darker section, but it should be reduced or aimed correctly around oncoming users.
Mixed routes need flexibility. A commute may move from a bright town centre to an unlit riverside path within minutes. A 500–800-lumen front light with distinct low, medium and high steady levels lets the rider conserve power under streetlights and increase output when the background becomes dark. The useful question is not whether the light can reach its maximum; it is whether the required mode lasts for the return journey.
On unlit roads, a starting range around 800–1,200 lumens is common in current guides. Here, beam reach and surface contrast matter more because potholes, debris and bends must be visible earlier. A higher number does not excuse poor optics or an unstable mount. If the beam drops toward the front wheel after every bump, its rated output does not solve the real problem.
Mountain bicycle lights serve a different visual task. A technical trail changes direction, height and surface rapidly, so peripheral coverage matters. Around 1,200 lumens and above is a practical category to investigate, but speed and terrain can push the requirement higher. Many trail setups combine a wide handlebar beam with a lighter helmet beam that follows the rider’s gaze. This is a system decision, not a reason to run maximum power everywhere.
How Beam Pattern Changes the Lumens a Bicycle Front Light Needs
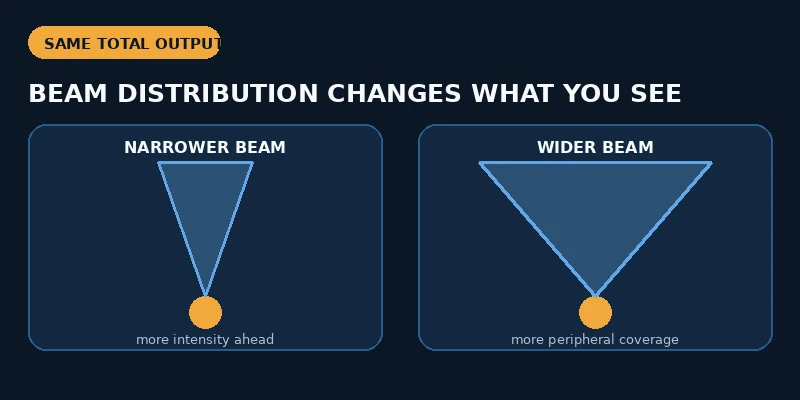
A bicycle front light does not illuminate by lumens alone. Its lens and reflector decide whether the output becomes flood, throw, a hotspot with spill, or a controlled road pattern. Beam width is useful only when the light remains intense enough across the area; throw is useful only when the near field and road edges are not left unusably dark.
For urban and road use, a smooth beam with controlled upward spill can make moderate output more effective. The rider sees the surface, while oncoming cyclists, pedestrians and drivers receive less direct glare. On a trail, some upward and lateral spill may be useful because the rider needs to see vegetation, banking and turns beyond a flat road plane. That same open beam can be inconsiderate on a shared path if it is aimed at eye level.
Beam angle numbers require context. A wider stated angle suggests more spread, but it does not prove uniform illumination, a clean cutoff or long-distance reach. A narrow angle suggests concentration, but it does not prove a useful hotspot. Compare a standardized beam image, the distance at which it was photographed, the mounting height and the output mode used. If those conditions are absent, the image is illustrative rather than comparative evidence.
This is why a lower-output light with well-matched optics can outperform a brighter but poorly distributed lamp for a specific route. Choose the pattern first, then choose enough lumens to make that pattern useful at the intended speed.
How Speed and Surface Affect Bike Lights for Night Riding
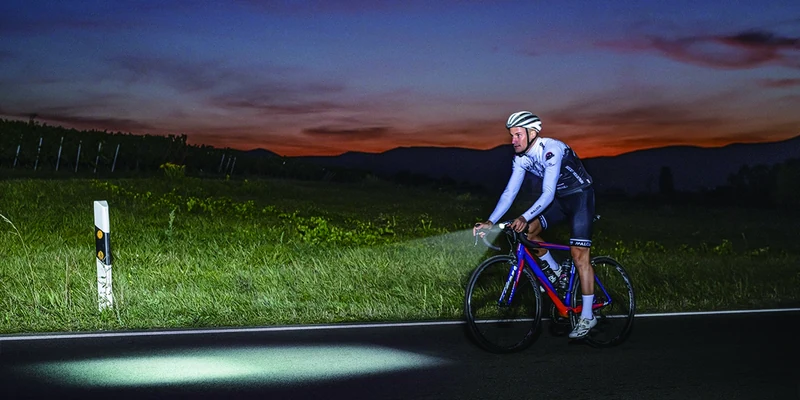
Bike lights for night riding must reveal a hazard early enough for the rider to recognize it, decide what to do and brake or steer. As speed increases, the bicycle covers more distance during that sequence. The beam therefore needs useful reach, not merely a bright patch immediately in front of the wheel.
Surface changes the decision as well. Smooth, familiar streets under ambient lighting place fewer demands on peripheral detail than a wet, broken road or a trail with roots and loose stones. Dark surfaces can appear to absorb more light, while wet surfaces can create reflections that reduce contrast. Fog, rain and airborne dust can also reflect light back toward the rider; simply selecting the highest mode may make the view less comfortable.
Set the light up on the actual bicycle and test it on the route at a conservative speed. Check the point where obstacles first become recognizable, not only where the central hotspot ends. Confirm that the mount stays in place under braking and vibration. If the required view is available only at maximum output, verify that maximum steady mode covers the full ride plus a reserve. If it does not, choose a more efficient mode, a better optical pattern or a light with more usable energy—not just a larger advertised lumen number.
Is a 600-Lumen Bicycle LED Light Enough? A Verified Example
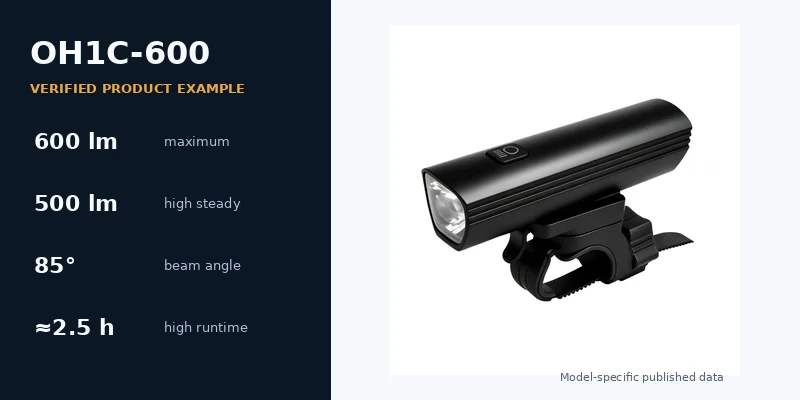
A 600-lumen bicycle LED light can be enough for many city, suburban and moderate-speed mixed routes when its beam and runtime fit the task. It should not be presented as universally sufficient for fast unlit roads or technical trails.
The current CONWICO OH1C-600 product page provides a useful specification audit. It lists a maximum output of 600 lumens, an 85-degree beam angle and a beam distance over 150 metres. Its steady modes are listed as 500 lumens for approximately 2.5 hours, 250 lumens for approximately 5 hours and 100 lumens for approximately 11 hours. The light uses a 2,500 mAh 18650 battery, Type-C charging with a stated 5 V/1 A input, an IPX6 water-ingress rating and a handlebar mount.
Several lessons follow. First, the maximum rating and the highest listed steady mode are not the same: the page lists a 600-lumen maximum but a 500-lumen high mode. Second, the 85-degree figure indicates width, not beam uniformity or glare control by itself. Third, the published distance is a model specification, not proof that every road hazard will be visible at that distance. Finally, mode-level runtime is more useful for planning than battery capacity alone.
For a streetlit commute, the 250-lumen medium mode may be the relevant comparison. For a route with dark sections, the 500-lumen high mode may be the relevant one. The decision still depends on the actual beam image, aim, speed and time in darkness.
How to Compare High Performance Bicycle Lights Beyond Maximum Lumens
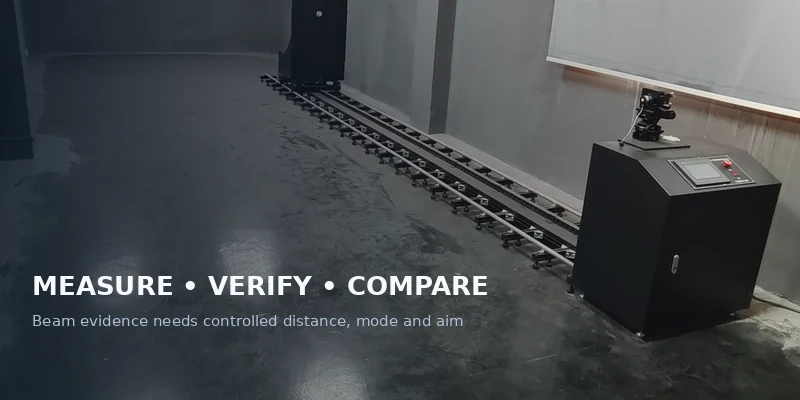
High performance bicycle lights should be compared as complete optical and power systems. Use this sequence before accepting a headline specification:
- Define the darkest route segment, typical speed and surface.
- Identify the steady mode that provides enough useful light for that segment.
- Review a beam image or measurement with known distance, mounting height and mode.
- Compare runtime in that exact mode, not the longest flash or economy figure.
- Ask whether output is regulated, whether it steps down and which test protocol defines runtime.
- Check the battery indicator and the behavior at low charge.
- Confirm the mount remains stable and allows repeatable aiming.
- Read the complete IP code without translating an X into a dust claim.
- Verify charging input and charge time rather than assuming all Type-C products charge at the same rate.
- Leave a reserve for delays, cold conditions, battery ageing and a return leg.
This comparison method supports more search questions than a simple lumen chart because it answers the decision behind them. It also prevents a common mistake: paying for output that the rider cannot use safely, cannot sustain, or cannot keep aimed at the road.
Bike Light Lumens FAQ
How many lumens do I need for a bike light?
Begin around 200–400 lumens for continuously lit streets, 500–800 for mixed routes, 800–1,200 for unlit roads and 1,200 or more for faster technical trails. Then validate beam pattern, speed, sustained output and runtime. These ranges are starting points, not standards.
How many lumens do you need for a front bike light?
A front light used only to be seen can use less output than one required to illuminate an unlit road. Choose by the darkest section of the route and the distance you need to see at your riding speed.
Is 500 lumens enough for a bicycle light?
A 500 lumens bicycle light can suit many lit or mixed urban routes and some moderate-speed dark sections when its beam is efficient. It may be insufficient for fast unlit riding or technical trails. Check the beam and runtime rather than treating 500 as a universal threshold.
Is 1000 lumens too bright for a bike light?
It can be excessive on a bright shared path if the light is poorly aimed or has uncontrolled upward spill. On an unlit road or trail, 1,000 lumens can be useful. Select a lower mode around traffic and comply with local lighting rules.
Are lumens or lux more important for bicycle lights?
They answer different questions. Lumens describe total visible output. Lux describes illuminance on a surface at a stated point. For real riding, review both when the test conditions are comparable, then inspect beam distribution and runtime.
Does a wider beam need more bike light lumens?
Often it does because the same total output is spread across a larger area, but optical efficiency and distribution matter. A wide beam can still be effective if it maintains useful intensity where the rider needs it.
Do bicycle LED lights stay at their maximum lumens for the full runtime?
Not necessarily. Some lights reduce output because of temperature, battery voltage or programmed power management. Look for a runtime curve or a clear statement of the test method and sustained level.
Choose Bike Light Lumens for the Darkest Part of the Ride
The best answer to how many lumens should a bike light have is the lowest output that still provides a controlled, useful beam for the darkest and fastest part of the planned ride—with enough runtime to finish it safely. Begin with a scenario range, then confirm beam distribution, sustained output, mount stability, battery status and charging.
To evaluate a real specification, compare the verified OH1C-600 bicycle front light data with your route requirements. To move from the lumen decision to full-system selection, explore CONWICO’s bicycle lights range and the complete guide to bike lights for night riding.